Have you ever managed to beat a particularly challenging boss, pull off an insanely skilful play, or achieve something else that you wish you could record and share?
Recording videos from games will open up a world of possibilities, and let you share your prowess or even create content of your own.
The only problem with recording videos from games is that it can be complicated, particularly if you have little or no experience doing so. That is why you may want to try out Gecata by Movavi, as it is a lightweight game recorder that will simplify the process while still letting you record in-game footage from any PC game that you want.
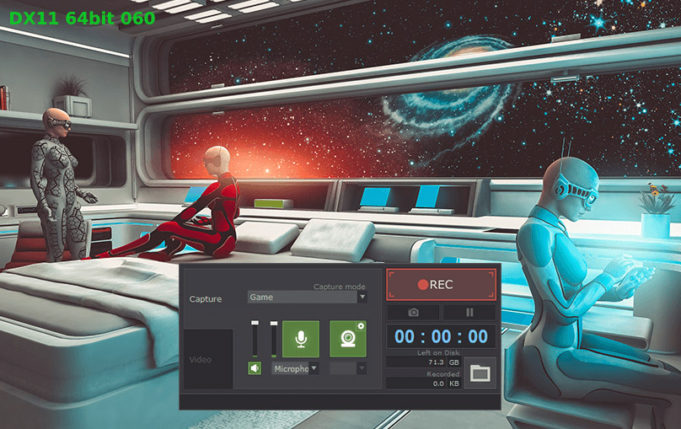
As soon as you launch Gecata by Movavi you’ll see several options in the interface. First, you should configure the settings under the ‘Capture’ tab and be sure to select ‘Game’ in the list under ‘Capture mode’.
By default, Gecata by Movavi will record in-game sounds, and the ‘System Audio’ icon will be highlighted to reflect that. If you want to also record audio via your microphone to add commentary to your game you should click on the ‘Microphone’ icon to highlight it. Additionally, if you want to record video via your webcam, you should click on the ‘Webcam’ icon as well.
Assuming you are recording video from a webcam you should open up the ‘Settings’ in Gecata by Movavi and switch it to the ‘Webcam’ tab. In that tab, you’ll find everything you need to adjust the parameters of the webcam recording and set the position, size, and frame so that its overlay over the in-game footage is perfect.
In the main interface, you should then open up the ‘Video’ tab and adjust the parameters that are there such as the resolution and frame rate. Keep in mind that while Gecata by Movavi can record at high resolutions and frame rates, it will increase the file size of the video.
After you’ve set everything up you can launch the game and start playing. At any point, you can press the ‘F10’ key on your keyboard to start recording, and then ‘F9’ to pause or ‘F10’ to stop. Keep in mind that when you do stop recording Gecata by Movavi will automatically save the video file in MP4 on your hard drive, so if you don’t want it to be saved you should just pause instead.
As you can see Gecata by Movavi is really quite easy to set up and doesn’t require any real technical knowledge. In fact, if you’d like to skip all the technical details entirely you should be able to start recording on the default settings.
Be sure to try recording some in-game footage using Gecata by Movavi to get a feel for it. Odds are once you try it out for yourself you’ll not only see how simple it makes it to record in-game footage but also how much you’re able to do with your newfound abilities.


